2019. 6. 28. 05:35ㆍIT/git
소개
-Python recognition 라이브러리는 딥 러닝으로 구축된 dlib의 얼굴 인식 기능을 사용하여 구축되었으며 이미지 파일 혹은 영상 속 얼굴을 인식 및 조작 가능한 효율적인 라이브러리입니다.
특징
- 이미지 파일에서 얼굴 찾기
-이미지 파일(영상)에서 얼굴의 특징을 찾고 조작하기
-이미지 파일 속 신원 확인하기(기계학습)
설치 환경:
OS- Windows 10 pro 64비트 운영 체제
CPU-i7 8550u 1.80 GHz
RAM-8.00GB
Graphic Card-내장 그래픽카드(UHD620)
기타
-Python 3.6
-Git Bash
-cmake 3.14.4
-numpy 1.16.4
-scikit-learn 0.21.2
-scipy 1.3.0
설치 과정
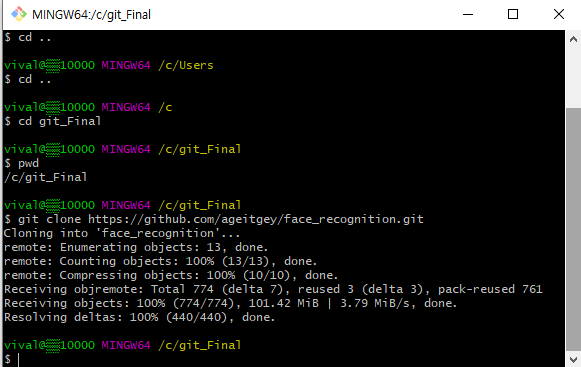
Step 1:git Bash를 통한 gitHub에서 프로젝트 클론
https://github.com/ageitgey/face_recognition에서 Clone or download 클릭-> URL 복사-> git Bash 실행 후 깃 설치할 폴더에 git clone URL 주소를 통해 프로젝트 파일을 내려받습니다.
Step2: Python 설치
https://www.python.org/에서 Download탭-> windows->Python 3.6.8 Windows x86-64 executable installer를 다운합니다.
▲설치 시 첫 화면에서 Add Python 3.6 to PATH를 해서 환경변수를 자동으로 추가시켜주세요!
Step 3: cmake 설치
https://cmake.org/download/ 링크를 통해 확장자명이 "msi"인 파일을 다운로드합니다.

▲설치 중간에 시스템 변수를 등록하는 두 번째 체크박스를 클릭하고 계속 설치해주세요.
설치가 완료되면 환경변수에 cmake\bin이 추가되었는지 확인을 해줍니다.
설치가 제대로 되었으면 cmd(명령 프롬프트)에서 cmake --version을 입력하면 설치가 된 것을 확인 가능합니다
이제 C:\Users\사용자명\AppData\Local\Programs\Python\Python36\Lib\site-packages에서 cmd를 실행시켜 아래 명령어를 입력해 설치해줍니다.
pip install cmake
Step 4:face_recognition 라이브러리 설치
마찬가지로 cmd(명령 프롬프트)를 C:\Users\사용자명\AppData\Local\Programs\Python\Python36\Lib\site-packages에서 실행시켜 아래 명령어를 입력해 설치해줍니다.
pip install face_recognition
여기서 자동으로 numpy 모듈과 dlib 모듈이 설치가 됩니다.
▲dlib가 설치되지 않는 분들은 3.6 버전인지 확인하시기 바래요! 3.7 버전인 경우 dlib 모듈이 호환되지 않아 설치가 안 되는 경우가 있었습니다.
▲추가적으로 설치가 안될 경우
https://files.pythonhosted.org/packages/0e/ce/f8a3cff33ac03a8219768f0694c5d703c8e037e6aba2e865f9bae22ed63c/dlib-19.8.1-cp36-cp36m-win_amd64.whl#sha256=794994fa2c54e7776659fddb148363a5556468a6d5d46be8dad311722d54bfcf 을 다운하시고 C:\Users\사용자명\AppData\Local\Programs\Python\Python36\Lib\site-packages로 다운로드한 파일을 옮겨줍니다->그 후 cmd를 통해 설치해줍니다.
pip install dlib-19.8.1-cp36-cp36m-win_amd64.whl
Step5: 추가적인 라이브러리 설치
얼굴 식별을 위한 머신러닝과 영상처리를 위해 Scikit-learn라이브러리와 OpenCV-Python을 설치해줍니다.
과정은 위와 동일합니다.
pip install --upgrade scikit-learn

pip install OpenCV-Python

모든 설치가 끝났습니다. 이제 한번 다운로드한 git의 예제를 실행해보겠습니다.
예제 실습 1: 이미지 파일에서 얼굴 찾기
깃 폴더\face_recognition\examples에서 find_faces_in_picture.py를 파이썬 3.6 IDLE로 실행합니다.
미리 준비한 이미지를 examples폴더에 넣습니다.
from PIL import Image
import face_recognition

# Load the jpg file into a numpy array
image = face_recognition.load_image_file("two_hero.jpg")

# Find all the faces in the image using the default HOG-based model.
# This method is fairly accurate, but not as accurate as the CNN model and not GPU accelerated.
# See also: find_faces_in_picture_cnn.py
face_locations = face_recognition.face_locations(image)

print("I found {} face(s) in this photograph.".format(len(face_locations)))

for face_location in face_locations:

    # Print the location of each face in this image
    top, right, bottom, left = face_location
    print("A face is located at pixel location Top: {}, Left: {}, Bottom: {}, Right: {}".format(top, left, bottom, right))

    # You can access the actual face itself like this:
    face_image = image[top:bottom, left:right]
    pil_image = Image.fromarray(face_image)
    pil_image.show()
기본적으로 HOG기반 모델을 사용하여 이미지의 모든 얼굴을 찾습니다.
two_hero.jpg라는 이름으로 제가 받아둔 이미지 파일에서 상단, 하단, 좌우의 얼굴 형상 이미지 픽셀 위치를 표시하여 해당 이미지 파일에서 얼굴만을 찾아보여주는 예제입니다.


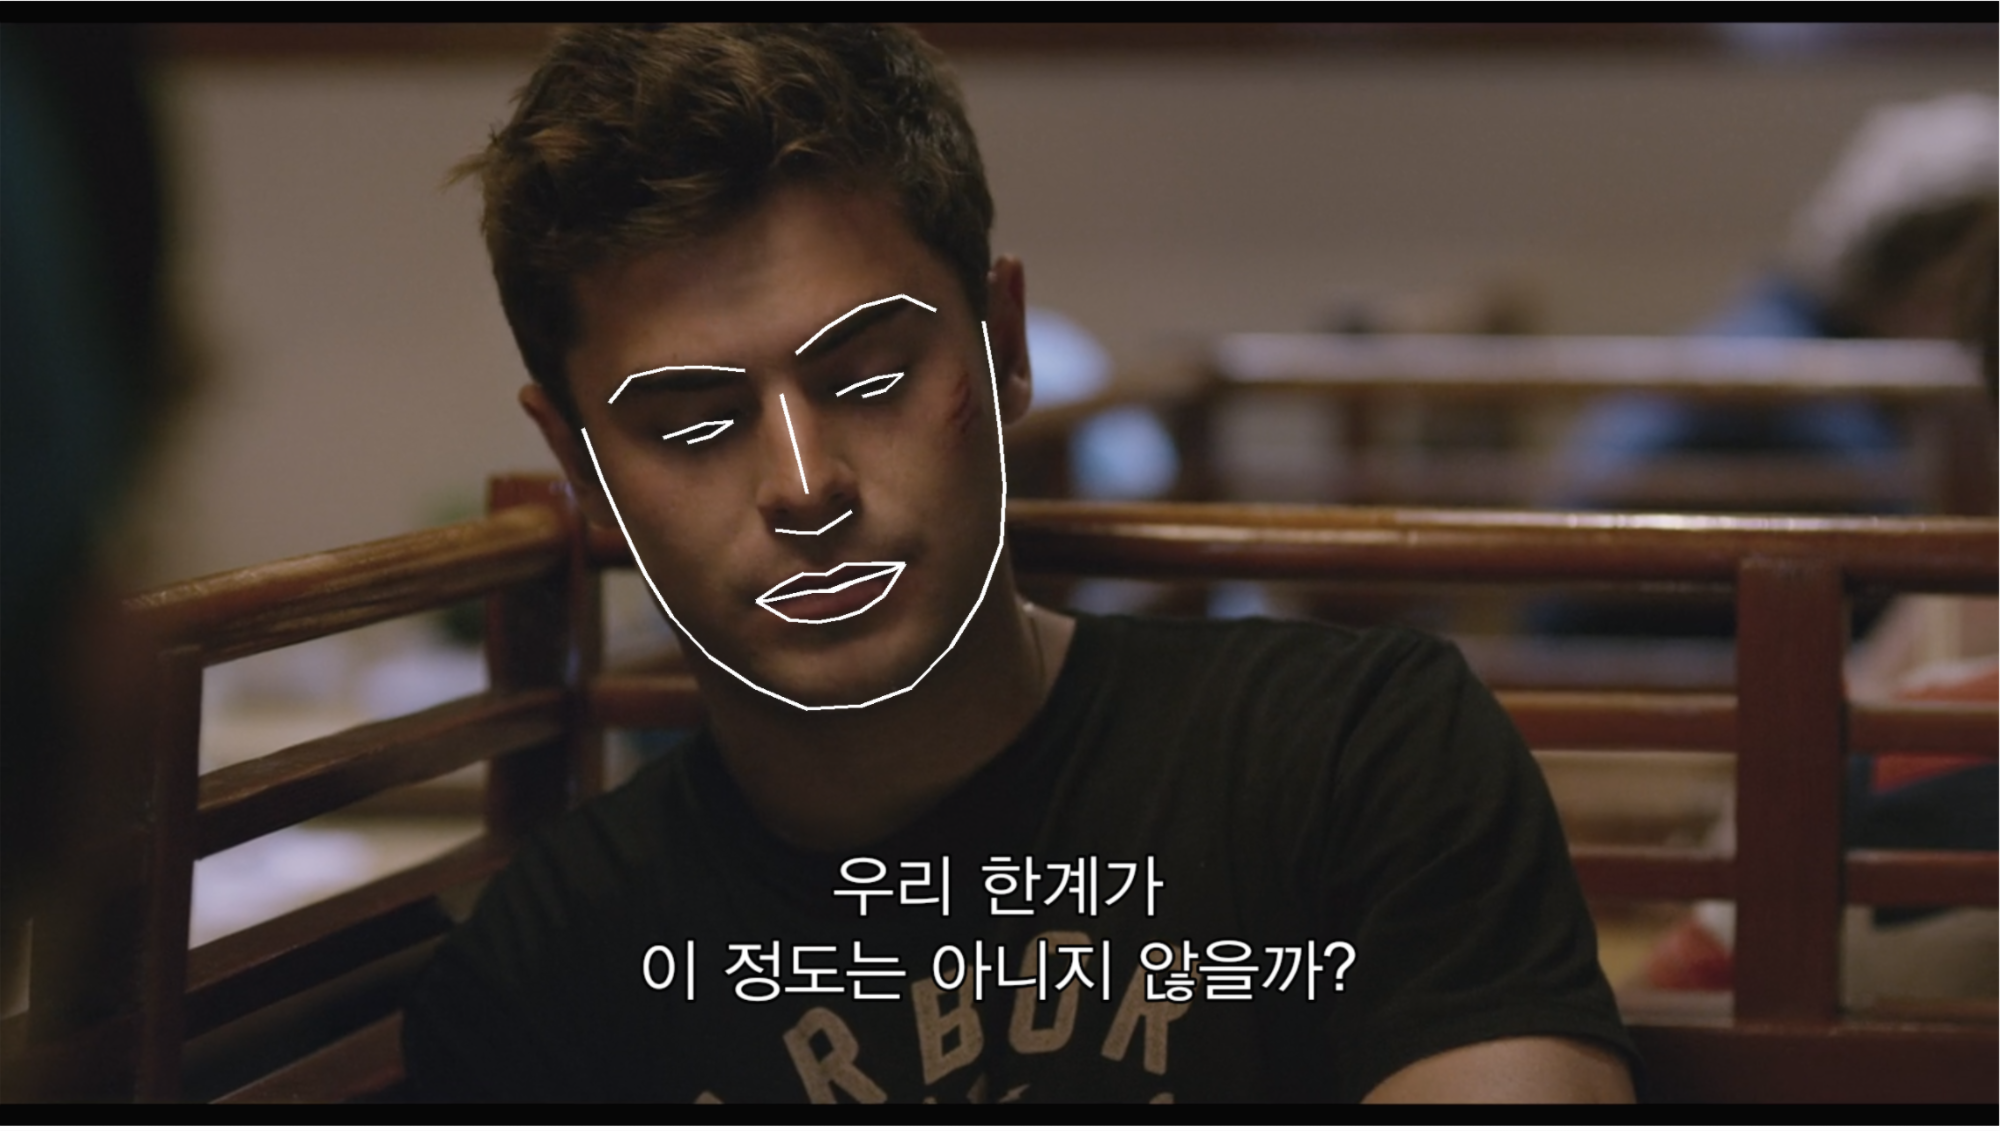
예제 실습 2: 이미지 파일(영상)에서 얼굴의 특징을 찾고 조작하기
깃 폴더\face_recognition\examples에서 find_facial_features_in_picture.py를 파이썬 3.6 IDLE로 실행합니다.
미리 준비한 이미지를 examples폴더에 넣습니다.
from PIL import Image, ImageDraw
import face_recognition

# Load the jpg file into a numpy array
image = face_recognition.load_image_file("test1.png")

# Find all facial features in all the faces in the image
face_landmarks_list = face_recognition.face_landmarks(image)

print("I found {} face(s) in this photograph.".format(len(face_landmarks_list)))

# Create a PIL imagedraw object so we can draw on the picture
pil_image = Image.fromarray(image)
d = ImageDraw.Draw(pil_image)

for face_landmarks in face_landmarks_list:

    # Print the location of each facial feature in this image
    for facial_feature in face_landmarks.keys():
        print("The {} in this face has the following points: {}".format(facial_feature, face_landmarks[facial_feature]))

    # Let's trace out each facial feature in the image with a line!
    for facial_feature in face_landmarks.keys():
        d.line(face_landmarks[facial_feature], width=5)

# Show the picture
pil_image.show()
test1.png 이미지 파일을 불러와 이미지에서 눈, 코, 입, 턱의 위치와 윤곽을 잡아 나타내 주는 예제입니다. 여기서 PIL imagedraw를 통해 그림을 그릴 수 있는 객체를 만듭니다.

이제 해당 특징을 찾은 다음 디지털 메이크업을 해주는 예제를 살펴보겠습니다.
깃 폴더\face_recognition\examples에서 digital_makeup.py를 파이썬 3.6 IDLE로 실행합니다.
from PIL import Image, ImageDraw
import face_recognition

# Load the jpg file into a numpy array
image = face_recognition.load_image_file("test1.png")

# Find all facial features in all the faces in the image
face_landmarks_list = face_recognition.face_landmarks(image)

pil_image = Image.fromarray(image)
for face_landmarks in face_landmarks_list:
    d = ImageDraw.Draw(pil_image, 'RGBA')

    # Make the eyebrows into a nightmare
    d.polygon(face_landmarks['left_eyebrow'], fill=(68, 54, 39, 128))
    d.polygon(face_landmarks['right_eyebrow'], fill=(68, 54, 39, 128))
    d.line(face_landmarks['left_eyebrow'], fill=(68, 54, 39, 150), width=5)
    d.line(face_landmarks['right_eyebrow'], fill=(68, 54, 39, 150), width=5)

    # Gloss the lips
    d.polygon(face_landmarks['top_lip'], fill=(150, 0, 0, 128))
    d.polygon(face_landmarks['bottom_lip'], fill=(150, 0, 0, 128))
    d.line(face_landmarks['top_lip'], fill=(150, 0, 0, 64), width=8)
    d.line(face_landmarks['bottom_lip'], fill=(150, 0, 0, 64), width=8)

    # Sparkle the eyes
    d.polygon(face_landmarks['left_eye'], fill=(255, 255, 255, 30))
    d.polygon(face_landmarks['right_eye'], fill=(255, 255, 255, 30))

    # Apply some eyeliner
    d.line(face_landmarks['left_eye'] + [face_landmarks['left_eye'][0]], fill=(0, 0, 0, 110), width=6)
    d.line(face_landmarks['right_eye'] + [face_landmarks['right_eye'][0]], fill=(0, 0, 0, 110), width=6)

    pil_image.show()
위 예제와 마찬가지로 test1.png 이미지 파일을 불러와 얼굴 윤곽을 잡아서 해당 얼굴에 RGBA색상을 이용하여 라인과 폴리곤을 이용해 얼굴 윤곽에 메이크업을 해주는 예제입니다.

예제 실습 3: 이미지 파일 속 신원 확인하기(기계학습)
깃 폴더\face_recognition\examples에서 face_recognition_knn.py를 파이썬 3.6 IDLE로 실행합니다.
import math
from sklearn import neighbors
import os
import os.path
import pickle
from PIL import Image, ImageDraw
import face_recognition
from face_recognition.face_recognition_cli import image_files_in_folder

ALLOWED_EXTENSIONS = {'png', 'jpg', 'jpeg'}


def train(train_dir, model_save_path=None, n_neighbors=None, knn_algo='ball_tree', verbose=False):
    """
    Trains a k-nearest neighbors classifier for face recognition.

    :param train_dir: directory that contains a sub-directory for each known person, with its name.

     (View in source code to see train_dir example tree structure)

     Structure:
        <train_dir>/
        ├── <person1>/
        │   ├── <somename1>.jpeg
        │   ├── <somename2>.jpeg
        │   ├── ...
        ├── <person2>/
        │   ├── <somename1>.jpeg
        │   └── <somename2>.jpeg
        └── ...

    :param model_save_path: (optional) path to save model on disk
    :param n_neighbors: (optional) number of neighbors to weigh in classification. Chosen automatically if not specified
    :param knn_algo: (optional) underlying data structure to support knn.default is ball_tree
    :param verbose: verbosity of training
    :return: returns knn classifier that was trained on the given data.
    """
    X = []
    y = []

    # Loop through each person in the training set
    for class_dir in os.listdir(train_dir):
        if not os.path.isdir(os.path.join(train_dir, class_dir)):
            continue

        # Loop through each training image for the current person
        for img_path in image_files_in_folder(os.path.join(train_dir, class_dir)):
            image = face_recognition.load_image_file(img_path)
            face_bounding_boxes = face_recognition.face_locations(image)

            if len(face_bounding_boxes) != 1:
                # If there are no people (or too many people) in a training image, skip the image.
                if verbose:
                    print("Image {} not suitable for training: {}".format(img_path, "Didn't find a face" if len(face_bounding_boxes) < 1 else "Found more than one face"))
            else:
                # Add face encoding for current image to the training set
                X.append(face_recognition.face_encodings(image, known_face_locations=face_bounding_boxes)[0])
                y.append(class_dir)

    # Determine how many neighbors to use for weighting in the KNN classifier
    if n_neighbors is None:
        n_neighbors = int(round(math.sqrt(len(X))))
        if verbose:
            print("Chose n_neighbors automatically:", n_neighbors)

    # Create and train the KNN classifier
    knn_clf = neighbors.KNeighborsClassifier(n_neighbors=n_neighbors, algorithm=knn_algo, weights='distance')
    knn_clf.fit(X, y)

    # Save the trained KNN classifier
    if model_save_path is not None:
        with open(model_save_path, 'wb') as f:
            pickle.dump(knn_clf, f)

    return knn_clf


def predict(X_img_path, knn_clf=None, model_path=None, distance_threshold=0.6):
    """
    Recognizes faces in given image using a trained KNN classifier

    :param X_img_path: path to image to be recognized
    :param knn_clf: (optional) a knn classifier object. if not specified, model_save_path must be specified.
    :param model_path: (optional) path to a pickled knn classifier. if not specified, model_save_path must be knn_clf.
    :param distance_threshold: (optional) distance threshold for face classification. the larger it is, the more chance
           of mis-classifying an unknown person as a known one.
    :return: a list of names and face locations for the recognized faces in the image: [(name, bounding box), ...].
        For faces of unrecognized persons, the name 'unknown' will be returned.
    """
    if not os.path.isfile(X_img_path) or os.path.splitext(X_img_path)[1][1:] not in ALLOWED_EXTENSIONS:
        raise Exception("Invalid image path: {}".format(X_img_path))

    if knn_clf is None and model_path is None:
        raise Exception("Must supply knn classifier either thourgh knn_clf or model_path")

    # Load a trained KNN model (if one was passed in)
    if knn_clf is None:
        with open(model_path, 'rb') as f:
            knn_clf = pickle.load(f)

    # Load image file and find face locations
    X_img = face_recognition.load_image_file(X_img_path)
    X_face_locations = face_recognition.face_locations(X_img)

    # If no faces are found in the image, return an empty result.
    if len(X_face_locations) == 0:
        return []

    # Find encodings for faces in the test iamge
    faces_encodings = face_recognition.face_encodings(X_img, known_face_locations=X_face_locations)

    # Use the KNN model to find the best matches for the test face
    closest_distances = knn_clf.kneighbors(faces_encodings, n_neighbors=1)
    are_matches = [closest_distances[0][i][0] <= distance_threshold for i in range(len(X_face_locations))]

    # Predict classes and remove classifications that aren't within the threshold
    return [(pred, loc) if rec else ("unknown", loc) for pred, loc, rec in zip(knn_clf.predict(faces_encodings), X_face_locations, are_matches)]


def show_prediction_labels_on_image(img_path, predictions):
    """
    Shows the face recognition results visually.

    :param img_path: path to image to be recognized
    :param predictions: results of the predict function
    :return:
    """
    pil_image = Image.open(img_path).convert("RGB")
    draw = ImageDraw.Draw(pil_image)

    for name, (top, right, bottom, left) in predictions:
        # Draw a box around the face using the Pillow module
        draw.rectangle(((left, top), (right, bottom)), outline=(0, 0, 255))

        # There's a bug in Pillow where it blows up with non-UTF-8 text
        # when using the default bitmap font
        name = name.encode("UTF-8")

        # Draw a label with a name below the face
        text_width, text_height = draw.textsize(name)
        draw.rectangle(((left, bottom - text_height - 10), (right, bottom)), fill=(0, 0, 255), outline=(0, 0, 255))
        draw.text((left + 6, bottom - text_height - 5), name, fill=(255, 255, 255, 255))

    # Remove the drawing library from memory as per the Pillow docs
    del draw

    # Display the resulting image
    pil_image.show()


if __name__ == "__main__":
    # STEP 1: Train the KNN classifier and save it to disk
    # Once the model is trained and saved, you can skip this step next time.
    print("Training KNN classifier...")
    classifier = train("knn_examples/train", model_save_path="trained_knn_model.clf", n_neighbors=2)
    print("Training complete!")

    # STEP 2: Using the trained classifier, make predictions for unknown images
    for image_file in os.listdir("knn_examples/test"):
        full_file_path = os.path.join("knn_examples/test", image_file)

        print("Looking for faces in {}".format(image_file))

        # Find all people in the image using a trained classifier model
        # Note: You can pass in either a classifier file name or a classifier model instance
        predictions = predict(full_file_path, model_path="trained_knn_model.clf")

        # Print results on the console
        for name, (top, right, bottom, left) in predictions:
            print("- Found {} at ({}, {})".format(name, left, top))

        # Display results overlaid on an image
        show_prediction_labels_on_image(os.path.join("knn_examples/test", image_file), predictions)
이 예제는 K-nearest-neighbors(KNN) 알고리즘을 얼굴 식별에 사용한 예제입니다.
이 예제는 학습을 통해 알려진 사람을 인식하는데 유용합니다. 조금 더 알고리즘에 대해 설명하자면 KNN 분류방식은 레이블이 붙은 (알려진) 얼굴 집합에 대해 먼저 훈련된 다음 사람을 예측합니다.
즉, 랜덤 이미지에서 K개의 가장 유사한 얼굴을 찾음으로써 라벨에 과반수 득표를 수행한 것을 나타냅니다.
우선 이 예제를 실행하기 위해서는 깃 폴더\face_recognition\examples\knn_examples\train폴더에 라벨을 가진 폴더를 생성하고 해당 폴더에 식별하고자 하는 이미지 파일을 여러 장 넣어둡니다.
그리고 깃 폴더\face_recognition\examples\knn_examples\test폴더에 실제 테스트하고자 하는 다수가 나온 이미지를 넣어줌으로써 개개인의 얼굴을 식별해 라벨을 붙여줍니다.

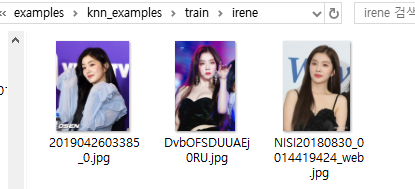
알려진 얼굴을 미리 폴더로 만들어 학습시킵니다.

이제 test폴더에 위와 같은 이미지를 넣고 테스트를 해보겠습니다.

결과적으로 많은 이미지를 학습시키면 시킬수록 더 정확한 결과로 랜덤 이미지에 식별 라벨링을 하는 것을 볼 수 있습니다.
(PS. 웹캠을 통한 블러처리와 웹켐을 통한 알려진 얼굴 라벨링 처리 역시 잘 수행되었습니다. 다만 영상 라벨링 처리는 write 속도가 너무 느려 결과를 볼순 없었습니다. ㅠㅠ 그래픽카드 문제인 듯싶네요.)
프로젝트를 통해 어려웠던 점
이번 프로젝트는 오픈소스를 이용하는 만큼 상당히 완성도가 높고 효율성이 좋은 소스가 많았습니다.
너무 방대한 나머지 어떤 프로젝트를 선택할지 고민하다가 딥 러닝을 통한 얼굴인식에 관한 프로젝트를 해보 싶어서 파이썬을 이용한 face_recognition 프로젝트를 접하게 되었습니다.
친절하게도 한글 README로 설명이 되어있어서 어느 정도 내용을 이해하는 데는 무리가 없었지만 MAC OS와 LINUX를 기반으로 개발된 과제여서 WINDOWS에서 설치 과정이 생략되어 환경을 구축하는데 큰 어려움이 있었습니다. 물론 영어로 된 포럼에서 설치 과정을 Step by Step으로 따라 해 봤는데 이마저도 visual studio를 통한 실습환경 구축이어서 생각보다 과정이 복잡하고 에러도 많았습니다.
많은 시행착오 끝에 파이썬 모듈설치를 site-package폴더에서 cmd를 실행시켜하는 것을 알게 되었고, 환경변수 설정만 잘된다면 설치 역시 문제없다는 것을 배웠습니다.
해당 프로젝트 설치에 문제가 있으신 분들은 제가 한 과정을 그대로 따라 해 보시면 많은 도움이 될 거라 예상합니다!